The Problem: To Analyze Surface Contours and Large Deformations
The K100/PJM optical head using the HoloFringe300 interferometry program provides a projected fringe moiré interferometer that can contour objects and measure large-scale deformations. Fringes are projected onto the object at an angle to the line of observation. The changes in location of the fringes measure the out-of-plane deformation of the object. The projected fringes do not appear in the output image because of the phase-step imaging technique employed and the processing performed by the interferometry program. Unlike holography, shearography and speckle correlation, projected fringe moiré can compare different object surfaces, or compare surfaces to a stored analytical reference pattern. Phase imaging and phase unwrapping can give sub-fringe resolution in the order of 10-4 of the object width.

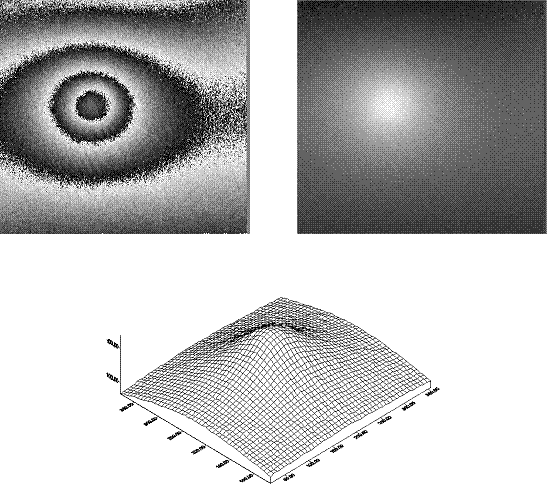
Expansion of Cardboard due to moisture. A sheet of thin cardboard was moistened on its back with a drop of water and compared to its profile before the wetting occurred. The fringe projection angle was calibrated to 45o and the fringe density was calibrated to 100 fringes across the horizontal image. Top left shows the wrapped phase fringes, displayed in real-time, of the deformation. Top right shows the fringe locus function obtained by unwrapping the fringes. The bottom image shows a 3D plot of the deformation.